Chapter 1 - Introducing Crystal Reports
Learn what's new in Crystal Reports XI and the new Crystal Reports R2 release. The tutorial teaches you how to create your first report and understand the Report Expert dialog boxes. The Two-Pass Report Processing Model is explained in full detail so you understand the internal workings of Crystal Reports.
 Become a Crystal Reports expert with the authoritative resource available.
The tuturials and tips in this book will take your skills to the next level.
Become a Crystal Reports expert with the authoritative resource available.
The tuturials and tips in this book will take your skills to the next level.Buy at

Tutorial 1-1. Printing Your First Report
This lesson walks you through the steps of creating a new report. You will use the Report Creation Wizard to make this as easy as possible. When you are finished, you will have created and printed out a simple report that shows employee names.
- Open Crystal Reports and make sure you are on the Start Page.
- Click on the Standard Report Wizard link.
- This is the first option under the New Reports column in the middle of the page. After clicking on this link, the Standard Report Creation Wizard opens. This wizard walks you through the steps of creating a new report. The first step is to select the data source.
- Double-click on the Create New Connection folder to expand it.
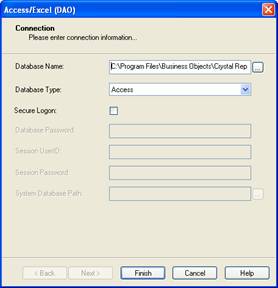
- Double-click on the Access/Excel (DAO) selection. This opens the Access/Excel (DAO) dialog box that lets you find the file to use as a data source.
- Click on the button to the right of the Database Name textbox and navigate to the Xtreme.mdb database. It is located at:
C:\Program Files\Business Objects\Crystal Reports 11\Samples\en\Databases\xtreme.mdb.
- Click the Ok button to select this database.
- Click the Finish button to close the dialog box.
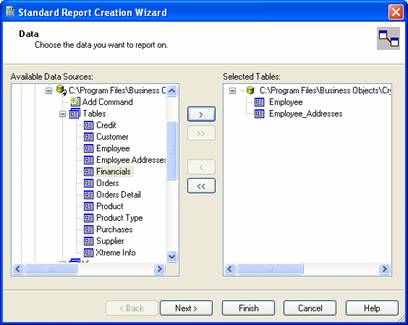
- Expand the Tables selection to see the tables in the database.
- Click on the Employee table name to select it.
- Click on the Right arrow to move the Employee table to the Selected Tables list.
- Click on the Employee Addresses table name to select it.
- Click on the Right arrow to move the Employee Addresses table to the Selected Tables list.
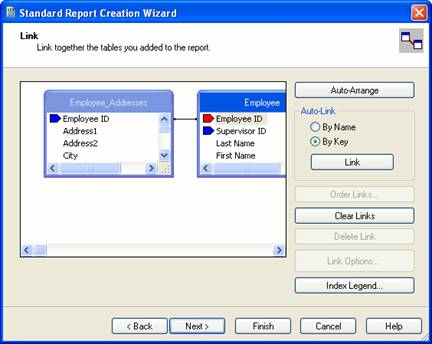
- Click the Next button at the bottom to save the tables. The Link dialog appears showing you the field(s) the two tables are joined by. In this example the Employee Id field links the Employee table to the Employee Address table. You'll learn more about linking tables in Chapter 11 on databases.
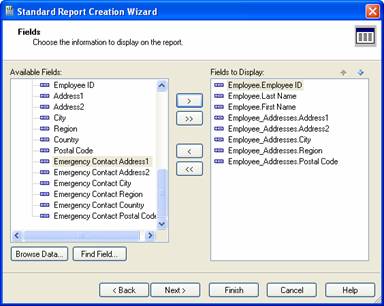
- Click the Next button to accept the default link. The Fields dialog appears showing all the fields from each table. Moving fields from the Available Fields list to the Fields to Display list on the right adds the fields to the report.
- Click on the following fields and then click on the Right arrow button to move them to the Fields to Display list: Employee Id, Last Name, First Name, City, and Region.
- Click the Next button to save these fields. The Grouping dialog appears showing the fields that were selected in the previous step. We will look at grouping and sorting records in Chapter 3. Click the Next button for now. The Record Selection dialog determines which records from the database get displayed. We will cover this in more detail later in the book and not make any changes for this tutorial.
- Click the Next button to move forward.
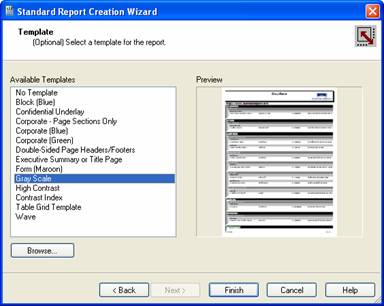
The Template dialog appears so you can choose from a list of pre-determined report formats to make a report look good. Crystal Reports comes with over a dozen different styles to choose from. As you click on each template, the preview area to the right shows an example of what the report would look like.
- You can select one of the templates to automatically format your report to look a certain way. In this example click on the No Template option to keep things simple. You can go back later and play with the other templates.
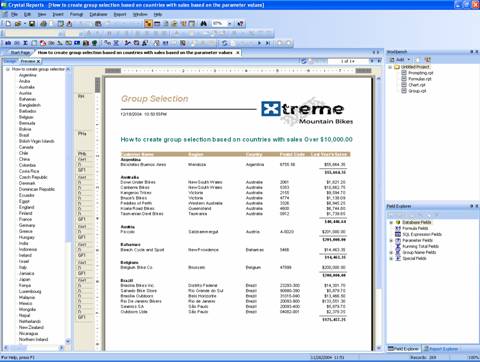
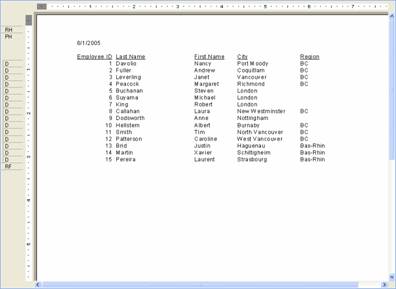
Crystal Reports creates the report and automatically previews it for you.
Overall, the report doesn't look too bad. One thing you might notice right away is that the Business Objects logo is displayed in the report header. Of course, in your own report you will customize the report header to have you own corporate logo, but we'll discuss how to do that later. Another thing to notice is that the report title is simply called Report1. This isn't a very descriptive name and you definitely need to change it.
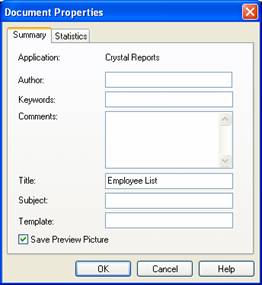
- On the application menu, select File | Summary Info. This opens the Document Properties dialog.
- Enter Employee List as the title.
- Click the Ok button to update the report tab.
- On the application menu select File | Print to print the report. The report will print out on your default printer.
- Save report as
Employee List.rpt.
- If you want to make more changes to the report's design, click on the Design tab above the report. This shows each section of the report and the report objects in each section. The details of modifying the report design are covered throughout the book.
To read all my books online, click here for the Crystal Reports ebooks.